|
H260 Electrical Upgrades Page
Click any picture to expand
Disclaimer:
This page is for entertainment only. Check with a licensed electrician
before wiring any boat. Use of any part of these procedures is at your own risk.
Your decisions, adjustments and actions must be based strictly on your
own knowledge and research. A lot of these ideas I got
from sailboatowners.com
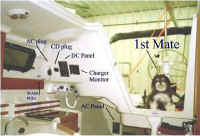
Because I want to do a little coastal cruising on
the Great Lakes and Florida, I need some enhancement of the electrical
system. That means an additional battery, DC cabin & cockpit power points
and AC shore power. Plus the normal VHF and GPS capability. Don Casey's "Sailboat
Electrics Simplified" was my bible. Saved me a lot of grief and
increased my level of confidence. Also the archives in http://www.sailboatowners.com/
was a great help in working out the install of these items. I also
found the information at this link useful: http://www.sailmail.com/grounds.htm
This project took a couple months of steady work,
but hey, what else can ya do when there is 3 foot of snow on the ground? Running
the wiring was the most difficult part. Make
sure you measure the wire carefully; You don't want any splices. I got over
confident and it was an expensive mistake. It takes a lot more wire than you
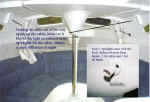
think. Hunter
installs conduit for running wire from the top of the compression post to the
starboard light over the stove, and under the aft bunk. However, you sometimes
have to do some creative pushing and pulling to get it all done. The starboard
stanchion blocks the conduit where it exits over the stove light, but you can
get wiring through with use of a wiring snake.
One tool most people don't have that you'll need
for the DC wire is a heavy duty crimper for the lugs. You can buy a cheap one
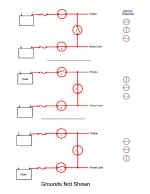
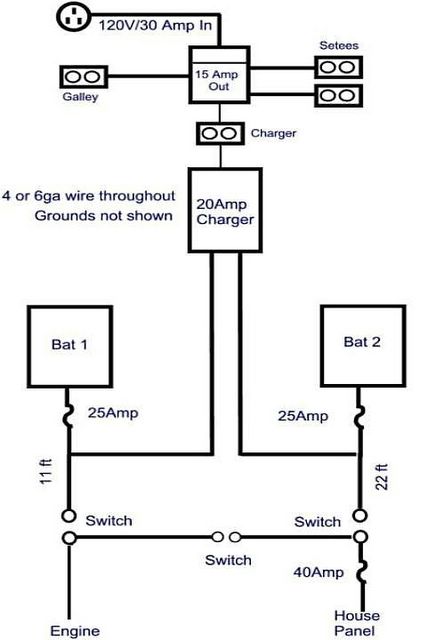
that you hit with a hammer. I've included simple wiring diagrams (w/o
grounds) to give an idea of what is involved.
|
|
 |
 |
 |
|
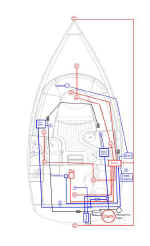
Boat Schematic |
DC Switching |
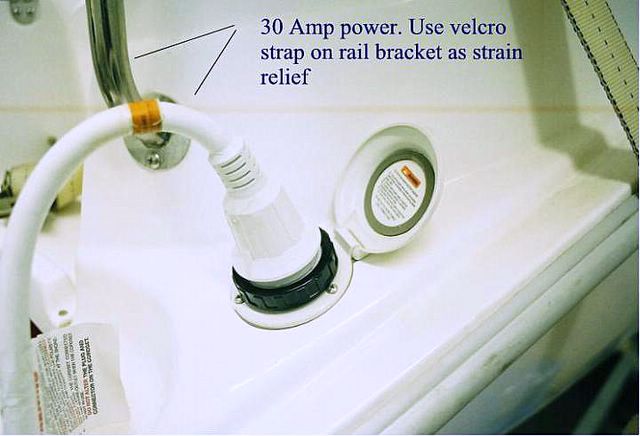
Shorepower/Charger |
Although the experts recommend at least 4 ga.
cable for the DC circuit, I went with 6ga wire because it is easier to work with
and I don't have any significant loads on the longest circuit. I've checked the
voltage drop on longest run of wire (22 foot) and there is virtually no
measurable difference on this circuit. After three years of use, the
installation is trouble free.
|
|
|
 |
|

|
|
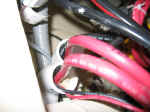
DC conduit behind
aft wall |
|
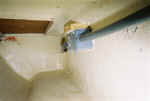
AC & DC
conduit |
|
AC & DC conduit
under aft floor |
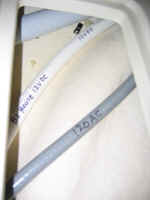
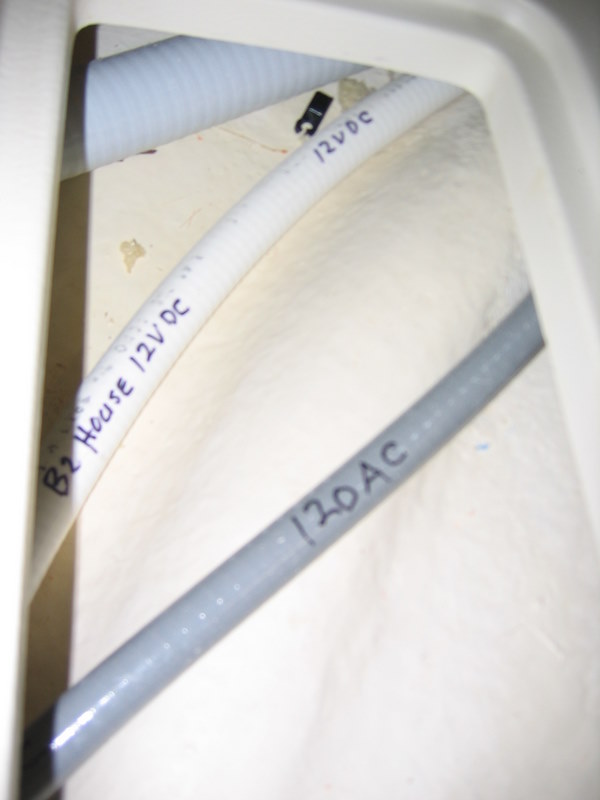
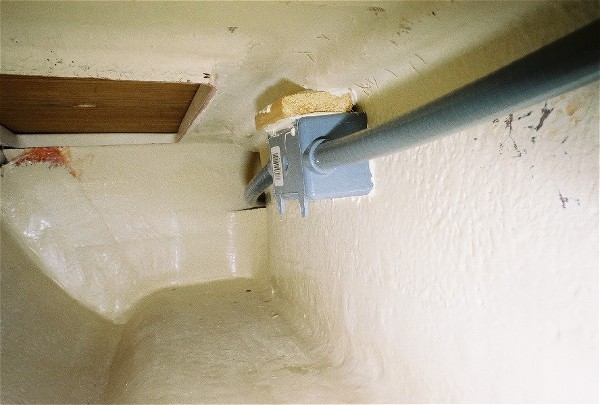
I decided to use 1"
flexible conduit to run the 6 ga. wire throughout the boat. This results in a
neater installation and protects the wiring from corrosion or chafing. Don Casey
suggests putting holes in the conduit at the low points in case water gets into
it. I did not do that because I sealed both ends of the conduit. The conduit
runs from the aft wall under the aft bunk floor and to the locations for the two
batteries. The conduit is totally hidden under the aft bunk floor and head and
galley sinks. This flexible conduit is the same stuff used for underground and
wet environments. Except for a couple spots where I ran out of conduit, I used
gray conduit for AC wiring and white for DC circuits. I used a magic marker to
identify the the DC and AC circuits.
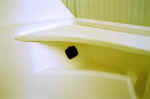
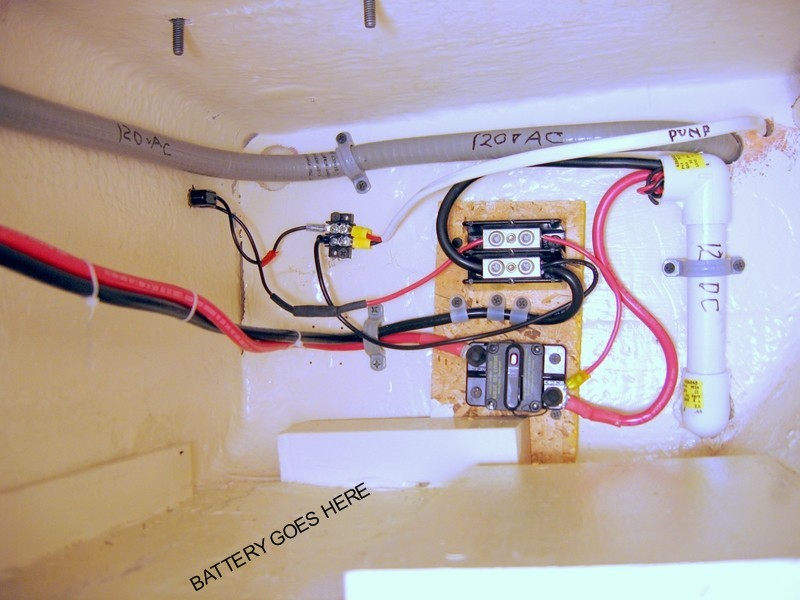
Hunter supplies one 2"
conduit under the aft bunk floor, but I also needed access for an additional
conduit. I drilled a 1.25" hole in the stringer under the the aft locker
for the 1" conduit the port side of the floor for the house battery. This
conduit runs through the clothes locker, under the galley sink to the port cabin
lazerette.
Regarding wire size. I don't
suppose it makes any difference which battery feeds the house circuits, but I
figured that the starter would draw more amps than the house so I gave it the
shorter run. The run to the port side is 22 ft and the starboard side about 10
ft. Preinstall the 6 ga. wire in the flexible conduit (4 ga. wire is preferred
but is too large for 1" conduit). Running the wire through the flexible
conduit is easier with the wire pulling grease you can buy at the hardware
store. If you install the house battery in the clothes locker you won't have any
voltage drop.
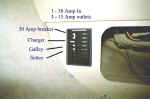
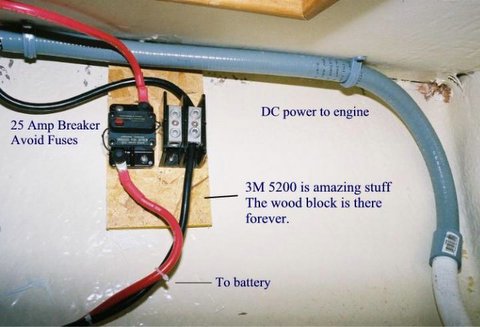
There is a factory installed 40
amp in-line fuse to protect the existing house circuit; I've replaced that with
a 25 amp "maxi" fuse because they are easier to find and
replace.
It would be a lot simpler to
put the house battery in the starboard side clothes locker, but I did not want
battery acid/fumes near clothing and wanted to save that space for clothes. Also
I felt it would be easier to check the battery in the port locker. This choice
has worked well for me. If you use AGM batteries maybe putting the house battery
in the clothes locker makes more sense, because they are install and forget, and
you don't have to worry about checking water level, damage from battery acid or
fumes from the battery.
 |
 |
 |
 |
 |
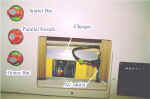
| Cabin Circuits |
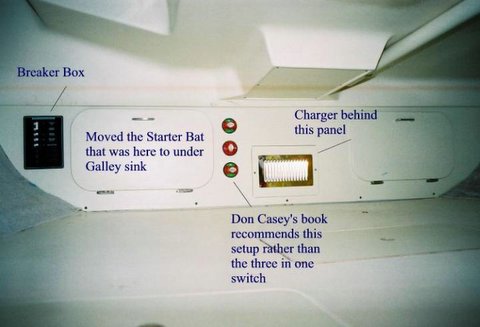
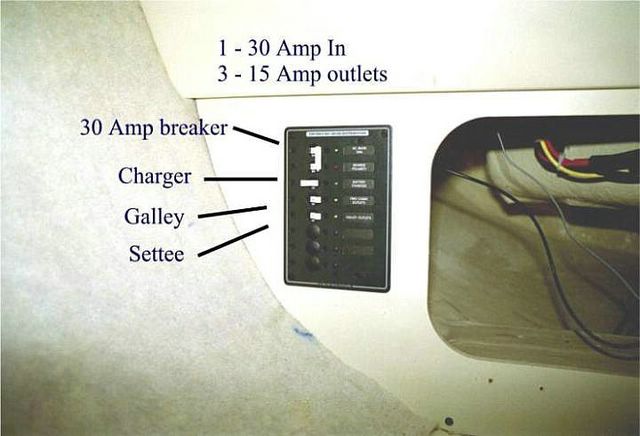
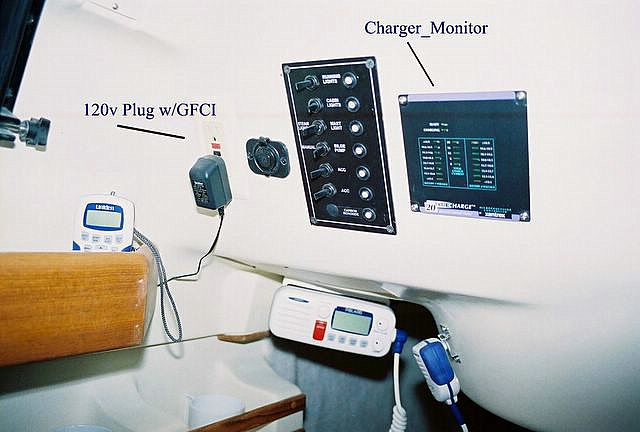
AC Breaker |
Aft bunk |
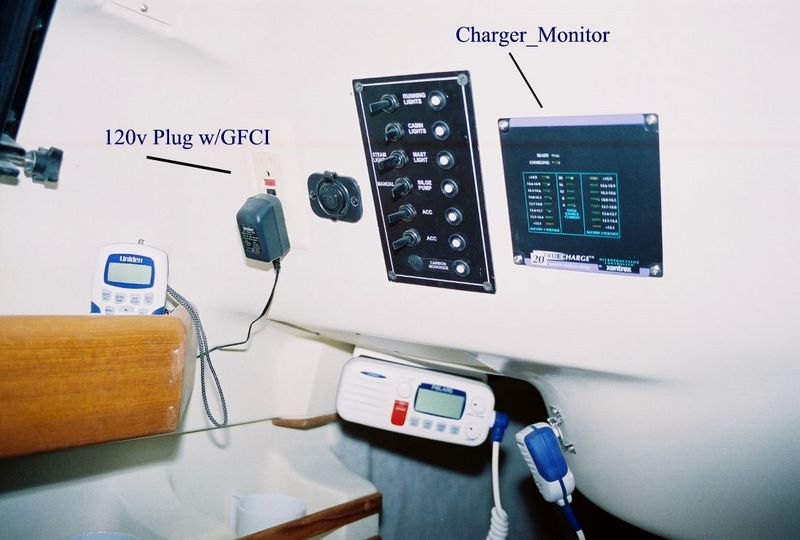
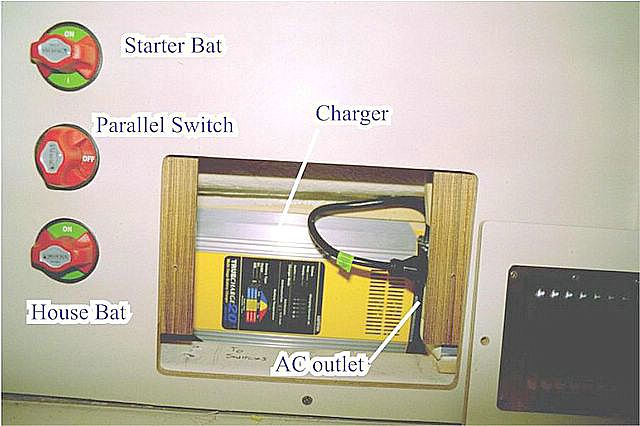
DC Switches/Charger |
Shore Power |
If you are just
adding or relocating a battery and want the ability to switch between them this
is a pretty simple job. However, I also did shore power and DC power points so
it got a lot more complicated.
If you have
limited experience with installing Alternating Current on a boat, do your
homework by reading up on the needed precautions. Don Casey's Sailboat
Electrics Simplified is
an excellent first source. Remember that if not properly
grounded, AC can
also be fatal to swimmers as well as people on the boat. Make sure outlets
are GFCI protected. The West
Marine Advisor is also an excellent source of information. Also, don't
forget use of power tools; if not plugged into a GFCI protected circuit, use a
portable GFCI which can be installed inline on the power tool’s extension
cord.
|
|

|
|
|
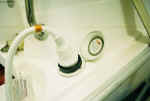
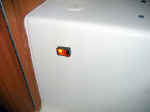
Water Pump switch
|
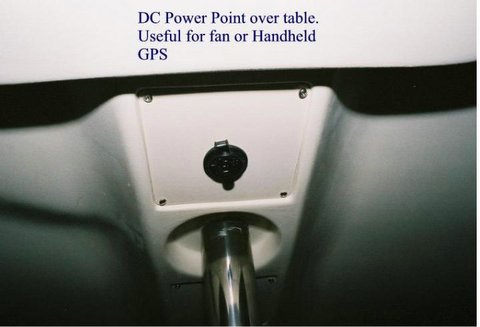
Powerpoint over table
|
Powerpoint in cockpit
|
|

|
|
|
|
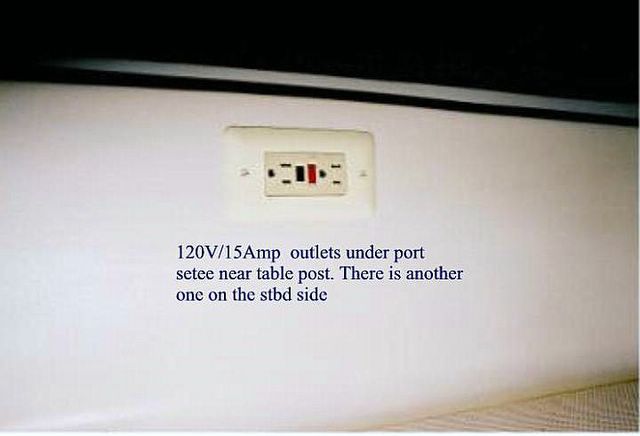
AC outlets under table |
AC outlets under table
|
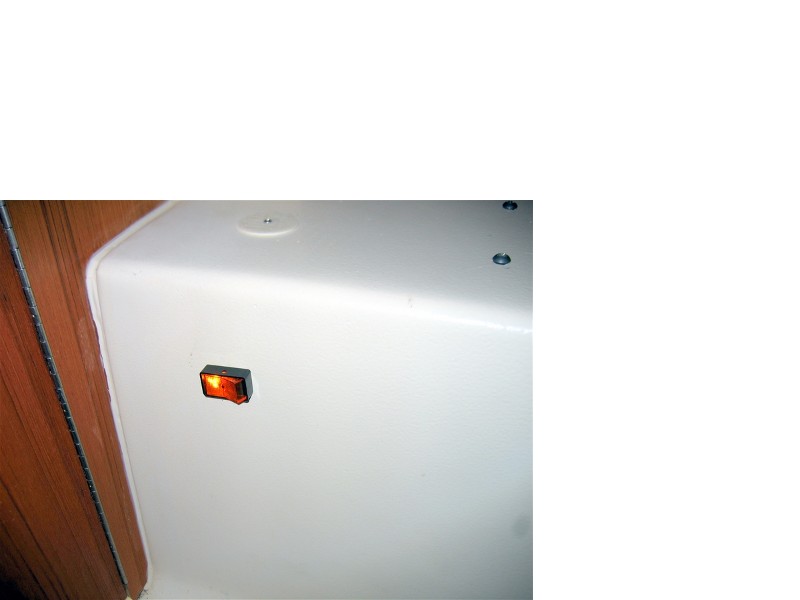
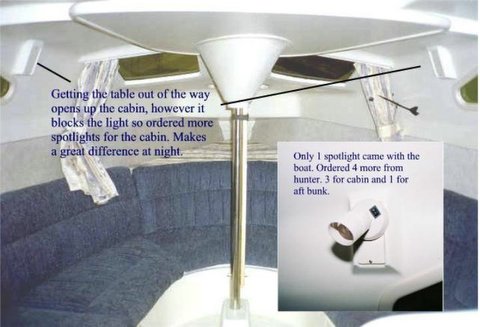
DC Lights
|
|
|

|
|
|
|
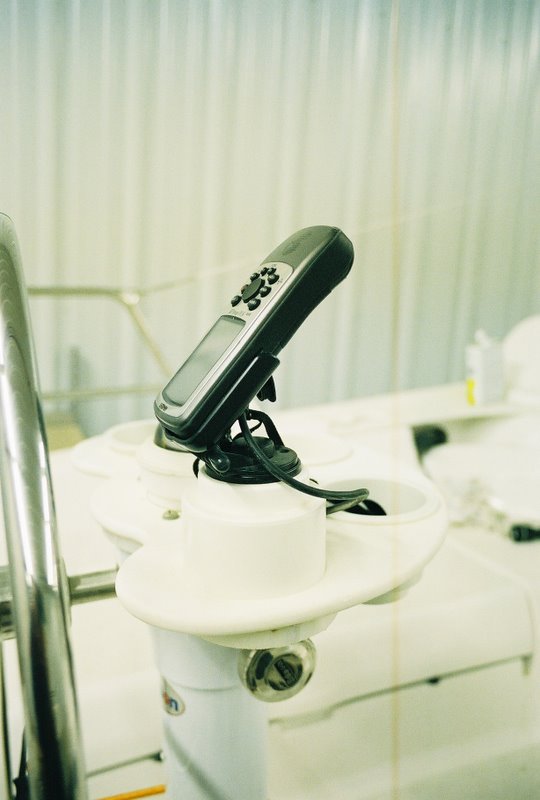
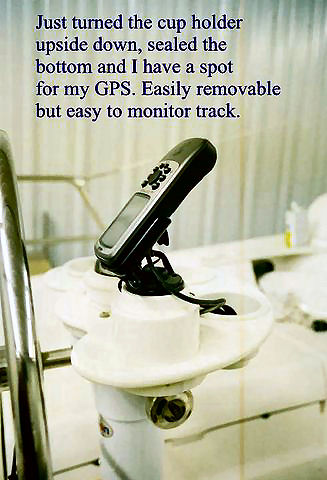
DC power for GPS
|
|
To repeat, unless you have a
lot of experience doing this kind of stuff, I highly recommend Don Casey's Sailboat
Electrics - it helped me a lot.
Basics:
Don't know what it cost - afraid to add it all
up.
Let me know if you have any questions. E-Mail: gkobernus
Disclaimer: This page
is for entertainment only. Check with a licensed electrician before wiring any
boat. Use of any part of these procedures is at your own risk.
Your decisions, adjustments and actions must be based strictly on your
own knowledge and research.
|


