|
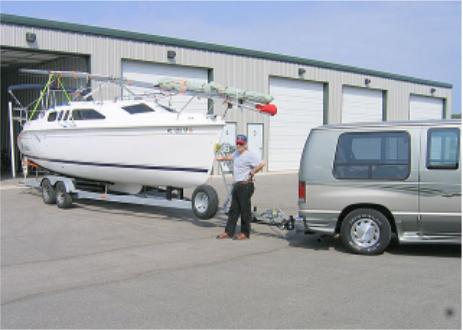
H260 Trailer Maintenance Checklist
From the Magic Tilt
Trailer Website

click to expand
Note: They
make a great triler, but I found Magic Tilt won't
talk to retail customers. I wanted info on where to
get a spare hub, but Magic Tilt referred me to a
couple of dealers in my area. When I called the
numbers provided, one was a bank the other said they
no longer carried the Magic Tilt brand because the
company was too difficult to deal with.
I
discovered that the axles, bearings and brakes for my trailer
are made by Unique Functional Products (UFP) http://www.ufpnet.com/ makers
of the Trailer
Buddy Axle. They were very helpful and send me free hub
covers to keep the grease from splattering the wheel. They also
referred me to Weymeir Marine, a company in Indiana that carried
their products. They too were very helpful and helped me get a
spare hub for my trailer.
LUBRICATING
MECHANISM
1. Prior to using
your trailer, apply a light coating of bearing grease to hitch
ball.
2. Engage the hitch ball and the coupler.
3. Tow your trailer to ensure grease adheres to all
surfaces
TONGUE JACK
Grease
jack
Some
tongue jacks have a small ZERK fitting. ZERK fittings allow you
to easily use a grease gun to lubricate the part. If your tongue
jack has a ZERK fitting:
1.
Ensure your grease gun has wheel bearing grease (or
equivalent).
2. Secure grease gun to ZERK fitting.
3. Pump grease until grease comes out of the jack - usually
excess will come out of the bottom of the jack.
4. Crank jack between completely up and completely down
several times to allow grease to adhere to all surfaces.
If your
jack does not have a ZERK fitting:
1.
Remove the black plastic cap on top of the jack. The cap is
usually secured by a small set screw on the side of the
jack.
2. Push grease into opening on top of tongue jack. Reapply cap
and secure with set screw.
3. Crank jack between completely up and completely down
several times to allow grease to adhere to all surfaces.
With swivel jacks.
In
addition to the procedure for applying grease to the jack, you
should lubricate the swivel surfaces.
1.
Apply a light coating of penetrating oil (such as WD-40) on
and around the swivel surface.
WINCH
ASSEMBLY
Oil
gears
1.
Verify the winch assembly is free of dirt and debris.
2. Apply a light coating of household oil (e.g. 3-in-1 oil) on
the gears only.
3. Operate the winch to ensure proper adhesion of oil onto all
gear surfaces.
Inspect strap, cable, rope
You
should inspect your winch strap, cable or rope every time you
launch and recover your boat. Stowing your winch strap, cable or
rope evenly and neatly will also extend its useful life.
1.
Verify the bow eye hook is secure to the strap, rope or cable.
If necessary, re-tie bow eye hook to the rope.
2. Completely extend the rope, cable or nylon strap.
3. Check the entire length of winch strap, cable or rope for
cuts, burrs, rust, tears or any other damage that would
degrade the performance of the securing strap. Replace as
necessary.
4. Ensure the end of the strap is secure to the winch
assembly.
5. Rewind the winch.
WHEEL
AND HUBS
Check
lug nuts
1.
Before each use, check torque on all lug nuts. With trailer
wheels blocked to eliminate the chance for accidental
movement, tighten each lug nut to 85 foot-pounds.
2. If replacement nut/nuts are required, ensure you replace
with the correct size and type.
Grease
bearings
There are three widely available types of bearing covers. Some
trailers have a cap (painted or galvanized) on the end of the
hub that protects the bearings. To add grease to this hub
assembly, you must disassemble the hub. With this system, a
semi-annual inspection and repacking the bearings is
recommended.
The second type of bearing system is a Posi-Lube spindle. On the
end of the spindle is a small ZERK fitting which allows grease
to enter the spindle and get routed to the bearing surfaces. To
lubricate this bearing, perform the following steps:
1.
Remove the dust cap from the hub exposing the ZERK
fitting.
2. Using bearing grease, secure the grease gun to the posi-lube
ZERK fitting.
3. Gently add grease.
4. When grease comes out around the outer edge of the bearing,
stop pumping grease.
5. Reapply the dust cove
The third type uses a device that use a piston to keep positive
pressure of grease on the bearing assembly. Because the piston
is spring loaded, the piston exerts a slight (3 psi) pressure
against the grease, which maintains a slight pressure between
the inside of the hub and the outside environment. When the hub
is submerged, water cannot enter the hub because of this
pressure.The two most common bearing grease device's on the
market are the "Trailer Buddy"
and the "Bearing
Buddy" unique functional products traaa
To
correctly lubricate a bearing equipped with Trailer Buddy or
Bearing Buddy, complete the following steps:
1.
Remove the protective bearing cover from the hub exposing the
Trailer Buddy or Bearing Buddy.
2. Attach a grease gun (with bearing grease) to the ZERK
fitting at the center of the hub.
3. Gently add grease.
4. When the center plate of the grease Buddy starts traveling
forward, stop adding grease. With experience, you will be able
to feel the additional pressure against the grease gun when
the Buddies are close to being filled.
Repacking bearings
At least
once a year when equipped with Trailer Buddy or Buddy Bearings
or Posi-Lube spindles (and semi-annually when these lubrication
systems are not installed) your trailer should have the bearings
repacked by your dealer. Your dealer will perform the
following:
1. Remove the tire.
2. Remove the dust cover or cap from the hub.
3. If present, remove the "Trailer Buddy"
4. Remove the cotter pin from the spindle.
5. If equipped with a tang washer (some torsion axles and posi-lube
spindles), bend the ears of the washer and remove.
CAUTION.
Never re-use a tang washer. Never use anything but an actual
tang washer. Reusing the tang washer or using a part other
than a tang washer can cause the wheel to become separated
from your trailer. This could cause serious property and
personal damage.
Note:
This advice from Magic Tilt conflicts with the Buddy Bearing
website that says Buddy Bearings need service every 5 years
-- some have gone as long as 15 years. Check this link for
more info on the Buddy Bearing http://www.bearingbuddy.com/
6.
Back off the axle nut (the large nut on the threaded
spindle).
7. Remove the hub assembly from the axle.
8. Disassemble the seals and bearings in the hub
assembly.
9. Carefully clean the bearings and hub with mineral spirits
(or other parts cleaning liquid).
10. Clean the spindle where the hub is seated on the
axle.
11. Perform a careful visual inspection of the spindle face,
bearings, hub compartment. If you notice any cracks, scoring
or voids, replace the damage part. If metal shavings are
evident in the grease, replace all bearings and seals. Magic
Tilt strongly recommends replacement of bearings at this same
time.
12. Replace (do not reuse) grease seal.
13. Reassemble hub assembly with repacked bearings. Grease
should be applied liberally to all surfaces.
14. Place hub on spindle and secure with axle nut. While
making sure that the bearings properly seat, never
over-tighten axle nut.
15. Insert new cotter pin or new tang washer. Do not reuse
either cotter keys or tang washers. Bend securing device to
lock axle nut.
WARNING.
By failing to use or improperly using an axle nut securing
device (cotter pin or tang washer) you jeopardize your
property, your safety and the safety of others. Always
ensure that cotter pins or tang washers have been properly
applied.
16.
Re-apply Bearing Buddy and protective bearing cover.
17. Secure tire to wheel (with 85 ft-lbs of torque per lug
nut). Tire should spin but not wobble when bearings have been
properly packed. This procedure may have to be slightly
modified if the trailer is equipped with brakes.
TIRES
WARNING.
Keep tires properly inflated. Failure to maintain correct
pressure will result in tire wear, potential tire failure
and possible loss of control of your trailer. Improperly
maintaining tire pressure will void your warranty but more
importantly creates a very dangerous road
condition.
BRAKES
Checking
brake fluid
1.
Remove the brake fluid reservoir cap on top of the
actuator.
2. Refill as necessary using DOT 3 heavy-duty brake fluid to
3/8 inch below the top of the reservoir.
3. Reapply cap.
Check
line connections
1.
With your boat removed from your trailer, trace your brake
line from the actuator to all brake clusters.
2. Verify that the brake line does not have cracks, abrasions
or holes. Replace components as necessary.
3. Verify all brake line connectors are secure and not
leaking. Replace as necessary.
4. If you have had to replace line and / or connections, you
must have your dealer refill the brake fluid and properly
bleed your brakes.
Verify
actuator travel
Your
actuator operates like a piston. When fully extended it does not
apply pressure to the brake fluid. When your vehicle slows, the
actuator is pressed in (toward the rear of the trailer) and
applies pressure to the brake fluid. The fluid in turn causes
the brakes to engage. Any item or debris that hinders the travel
of the actuator diminishes the effectiveness of your
brakes.
1.
Annually have your dealer verify the distance over which your
actuator travels between fully extended and fully
engaged.
2. Your dealer will compare this travel distance to
information in your brake owner’s manual or published brake
system operating characteristics.
3.
Your dealer may also apply a lightweight oil to inhibit rust
from accumulating on the actuator.
Adjust brakes (Drum Brakes)
Brake adjustments should only be done by a qualified mechanic.
Magic Tilt strongly encourages you to return to the dealer
where you purchased your boat, trailer and engine. Only this
dealer understands the unique nature of your boating equipment
as well as the local road conditions. Correct the adjustment
of your drum brakes after the first 50 miles of operation,
again after another 300 miles and then every 600 miles.
Regardless of the amount of miles you put on your trailer,
Magic Tilt recommends a drum brake adjustment at least
annually. Adjust each wheel brake assembly separately. To
perform this maintenance, the mechanic will have to safely
jack up your trailer. When scheduling your service
appointment, you may wish to ask the mechanic whether they can
remove your boat from the trailer or if you will have to make
arrangements to have the boat taken off the trailer.
To
complete this adjustment, the mechanic will do the following:
1.
Locate the brake adjustor - behind slot at bottom of the back
side of each backing plate.
2. Tighten adjustor with brake adjustment tool until you
cannot rotate the wheel by hand.
3. Caution, only rotate the drum forward.
4. Back off the adjustment ten notches (or ten
clicks).
ELECTRICAL
Check
tail lights / brake lights / verifying ground
1.
Before attaching the wire harness from the trailer to the wire
harness from the tow vehicle, trace the wiring system from the
tow vehicle to the trailer and back. Look for bare wires,
cracked or chafed insulation and corroded or rusted
terminals.
2. While tracing the system, verify the white ground wire is
connected to the trailer frame. Your tail lights may have an
independent grounding system (evident from a short white wire
from the tail light assembly). Verify that this wire is also
securely attached to the trailer frame.
3. Replace any wires, wire harnesses or securing screws that
are damaged, worn or missing.
4. Attach the wiring harness from the tow vehicle to the
trailer. If equipped with disc brakes, also attach the single
wire for the reverse lock-out solenoid.
5. Have another person depress the brake pedal and the turn
signals while you remain behind the trailer and verify that
the correct lights illuminate on both the trailer and the tow
vehicle.
6. On trailers equipped with disc brakes - to verify the
reverse solenoid works correctly, gently back the
trailer.
7. Replace cracked, damaged or poorly illuminating bulbs.
Replace crack, work or defective light shields and light
covers. Some tail lights have a removable insert that can be
removed through the bottom of the tail light. With these tail
lights, you do not have to remove the lens cover to gain
access to the tail light bulbs or their sockets.
8. A small amount of electrical socket grease on plug contacts
and light bulb bases will help prevent rust and
corrosion.
Winterization Procedures
STORING
YOUR TRAILER
1.
Park in a protected area such as garage, carport, etc. If you
cannot park in a protected area, cover your trailer with a
boat cover or tarp.
2. Repack wheel bearings to remove any lingering water or
debris.
NOTE.
If water stands on bearing surfaces for as short a time as
several weeks without the wheel being turned, rust and
bearing damage will begin. Before storing the trailer for
prolonged periods, bearings should be re-packed.
3.
Lubricate moving parts such as rollers, winches and other
rolling parts with lightweight household oil.
4. Tighten loose nuts and bolts.
5. Block the wheels, or better, jack up the trailer so the tires
do not come in contact with the ground. If your boat and trailer
are not protected in a car port, garage or with a boat cover,
you should still cover the tires to protect against ultra-violet
rays.
6. Block the tongue and crank the tongue jack to the completely
closed position.
|